
나의 발자취
[Node.js] 시퀄라이저 - 댓글 기능 구현하기 본문
2024.10.16 - [Backend] - [Node.js] 시퀄라이저 - 댓글 기능 만들기
[Node.js] 시퀄라이저 - 댓글 기능 만들기
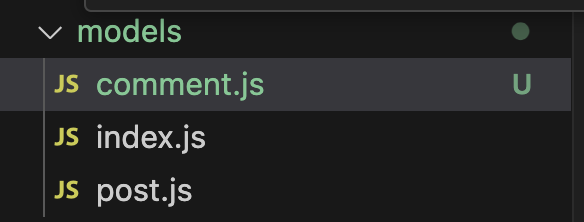
comment.js일단, Comment DB 생성 작업을 위해 models > comment.js라는 새로운 파일을 생성 후 post.js 의 전체 내용을 복붙해준다. 필요 없는 내용은 날리고 맞게 작업const { Sequelize } = require(".");module.exports
wildguess.tistory.com
에 이어서 작성한다.
깃허브 레포지토리 커밋 히스토리: https://github.com/est22/backend/commits/main/nodejs/08/ch08_02
comment.js
일단, Comment DB 생성 작업을 위해 models > comment.js라는 새로운 파일을 생성 후 post.js 의 전체 내용을 복붙해준다.
필요 없는 내용은 날리고 맞게 작업
const { Sequelize } = require(".");

module.exports = (sequelize, DataTypes) => {
  /** create table Comment(
   *    id INTEGER primary key autoincrement,
   *    title TEXT not null,
   * )
   *
   *
   **/
  const Comment = sequelize.define(
    "Comment",
    {
      id: {
        type: DataTypes.INTEGER,
        allowNull: false,
        primaryKey: true,
        autoIncrement: true,
      },
      content: DataTypes.STRING,
    },
  );
  return Comment;
};
이제 foreign key 작업을 해준다.
  Comment.associate = function (models) {
    models.Comment.belongsTo(models.Post);
  };
작업된 코드 내용

post.db를 새로고침 해주면, 아래와 같이 Comments DB가 새로 생기면서 PostId 필드 옆에 외래키가 붙어있는 것이 보인다!

자, 여기서 의문!
나는 분명히 "Comment"라고 DB를 생성했는데, 왜 post.db에 생성된 테이블 이름은 "Comments" 일까?
Sequelize에서는 모델 이름의 기본 복수형을 자동으로 생성하여 테이블 이름을 결정한다.
따라서, Comment 모델을 정의하면 Sequelize는 자동으로 테이블 이름을 "Comments"로 변환한다.
이는 일반적인 데이터베이스의 테이블 네이밍 규칙을 따르기 위한 것이다!
index.js 에서,

db['Post'] = Post
db['Comment'] = Comment
['Post', 'Comment']
이렇게 담겨있는데, 지금 comment.js에서 위에서처럼 foreign key를 연결해주게 되면,
belongsTo()를 통해 연결이 된다.
POST comment - 특정 게시글에 댓글 추가하기
app.post("/posts/:id/comments", async (req, res) => {
  const postId = req.params.id; // Post의 ID
  const { content } = req.body;
  const comment = await models.Comment.create({
    PostId: postId,
    content: content,
  });
  res.status(201).json({ data: comment });
});

GET comment - 특정 게시글 댓글 가져오기
findAll() 함수 안에 where 조건문을 사용하여 postId가 일치할때 그 게시글의 댓글을 가져온다.
app.get("/posts/:id/comments", async (req, res) => {
  const postId = req.params.id;
  const comments = await models.Comment.findAll({
    where: {
      PostId: postId,
    },
  });
  res.status(200).json({ data: comments });
});
여기서 꿀팁
맨날 커맨드 방향키 위로 하기 불편할 때, 이전 명령어들 중에서 특정 키워드를 포함하여 검색하고 싶을 때
history | grep <키워드> 를 쓴다.
history | grep comments
그러면 아래와 같이 "comments"가 들어간 이전 명령어 내역들이 나온다.

멀티플도 가능하다.
history | grep <키워드> | grep <키워드>

이제 컬으로 post id = 1의 댓글을 가져오는 쿼리를 날리면 아래와 같이 결과값을 성공적으로 가져오는 것을 볼 수 있다.

GET comment - 댓글 가져올 때 해당하는 게시글도 가져오기
위 코드에서, include 조건을 포함시켜줄 것이다.
를 where조건절 밑에 넣어준다. (주의! where 조건절 '위에' 넣어줄 경우에는 모든 포스트를 다 가지고 오게 된다)
app.get("/posts/:id/comments", async (req, res) => {
  const postId = req.params.id;
  console.log(`postId: ${postId}`);
  const comments = await models.Comment.findAll(
  {
    where: {
      PostId: postId, // 여기에 조건을 추가
    },
    include: [{ model: models.Post }], // 필요한 경우에만 추가
  }
  );
  res.status(200).json({ data: comments });
});
이 작업이 끝이 아니라, 역으로도 게시글을 호출했을 때 그에 딸린 comment 를 가져오도록 작업을 해야한다.
그러기 위해서는 app.js의 get("/posts")에 위의 include 조건을 또 넣어준다.

app.get("/posts", async (req, res) => {
  // select * from posts;
  const posts = await models.Post.findAll({
    include: [{ model: models.Post }],
  });
  res.json({ data: posts });
});
그리고 post.js로 가서 아래 코드를 넣어준다. (Line 33-35)

Post와, Comment 테이블을 연결해주어야 한다.
그리고 기존의 데이터베이스 새로 생성을 위해, 삭제를 해준다. 새로고침을 하면 새로운 post.db가 뜰 것이다!
컬을 통해 새롭게 post, comment를 넣어주자.
그리고 다시 GET 요청을 날렸을 때 해당하는 post, comment들이 나온다. (포스트맨에서 )
curl -X GET -H "Content-Type: application/json" http://localhost:3000/posts/1/comments

PUT - 댓글 수정하기
app.put("/comments/:id", async (req, res) => {
  const id = req.params.id;
  const { content } = req.body;
  const comment = await models.Comment.findByPk(id);
  if (comment) {
    comment.content = content;
    await comment.save();
    res.json({ data: comment });
  } else {
    res.status(404).json({ result: "comment is not found" });
  }
});
위와 같이 작성 이후
curl -X PUT -H "Content-Type: application/json" -d '{"content":"수정된 코멘트"}' http://localhost:3000/comments/1
이후
curl -X GET -H "Content-Type: application/json" http://localhost:3000/posts/1/comments
로 확인하면 아래와 같이 수정된 데이터가 잘 반영된 것이 확인된다.

DELETE - 댓글 삭제하기

'Backend' 카테고리의 다른 글
| [Node.js] sequelize-CLI 기존 테이블 필드 추가, 외래키 association 적용 (1) | 2024.10.16 |
|---|---|
| [Node.js] sequelize-CLI로 테이블(모델) 생성, 테이블 구조 변경 migration, seed 데이터 추가 (1) | 2024.10.16 |
| [Node.js] 시퀄라이즈를 활용한 게시판 생성, curl 날려서 데이터 주고받기 - GET, PUT, DELETE (0) | 2024.10.16 |
| [Node.js] 시퀄라이즈를 활용한 게시판 생성, curl 날려서 데이터 주고받기 - POST (2) | 2024.10.15 |
| [Node.js] ORM 시퀄라이즈(Sequelize)를 활용해서 테이블 만들고 데이터 주고받기 (0) | 2024.10.15 |


