
나의 발자취
Protocol, Delegate Pattern in UIPickerView 본문
Protocol은 말그대로 규약이라는 뜻으로, 어떤 프로퍼티/메서드를 꼭 가져야할지 명시를 하는 방법이다. 예를 들어 어떤 타입은 어떤 프로토콜을 따라하는지 = 어떤 규약(규칙)을 준수해야하는지 얘기를 해주는것인데,
이렇게 해놓으면 그 타입은 어떤 프로퍼티/메서드를 가지고 있는지 예측가능한 장점이 있다.

UIPickerView에서 고를 수 있는 걸 component라고 하고, 각각의 옵션을 row라고 한다.

각각의 컴포넌트, 로우 개수를 DataSource에서 함수를 통한 질의로 전달받게 된다.

public protocol UIPickerViewDataSource : NSObjectProtocol {
	// returns the number of 'columns' to display.
	@available(iOS 2.0, *)
	public func numberOfComponents(in pickerView: UIPickerView) -> Int

	// returns the # of rows in each component..
	@available(iOS 2.0, *)
	public func pickerView(_ pickerView: UIPickerView,
numberOfRowsInComponent component: Int) -> Int
}
PickerViewSample 프로젝트 생성
총정리
1. 프로토콜 적용
2. 메서드 구현 (component, row 전달)
3. 누가 Delegate인지 적용
picker.dataSource = self
picker.delegate = self
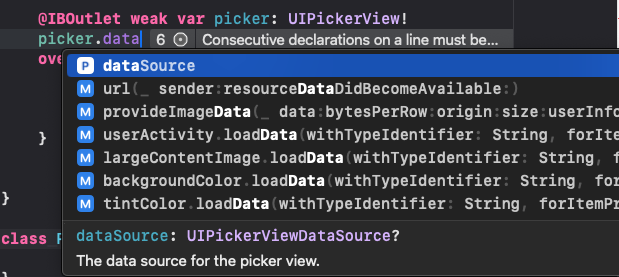
1. picker 객체를 스토리보드에서 만들고, picker.dataSource를 쳐서 .datasource의 타입이 UIPickerViewDataSource? 인 것을 확인
2. 클래스 만든 후 타입 UIPickerViewDataSource 정의 후 메서드 구현

보면 이렇게 정의를 해야한다고 나옴. 근데 여기서 Fix를 고치면 프로토콜 메서드 말고도 다른 잡다한 것들이 나오므로 하지말자..
대신!
UIPickerViewDataSource 타입을 보면(Cmd+클릭) 아래와 같이 NSObjectProtocol을 따르므로, 아래에 나온 두 개의 메서드를 정의해주어야한다고 나옴!

따라서 내가 만든 PickerDataSource 클래스에서도 프로토콜대로 정의를 해준다.
그전에 에러를 해결하기 위해 PickerDataSource 클래스 타입에 NSObject 도 아래와 같이 설정해준다.

import UIKit

class ViewController: UIViewController {

    @IBOutlet weak var picker: UIPickerView!
    let aaa = PickerDataSource()

    override func viewDidLoad() {
        super.viewDidLoad()
        picker.dataSource = aaa


    }

    class PickerDataSource: NSObject, UIPickerViewDataSource {
        func pickerView(_ pickerView: UIPickerView, numberOfRowsInComponent component: Int) -> Int {
            4
        }

        func numberOfComponents(in pickerView: UIPickerView) -> Int {
            1
        }
    }
}
그치만 이와 같이 클래스가 별도로 되어있으면 VC에게 불편하므로, 이를 다 지우고 ViewController 클래스의 타입에 UIPickerViewDataSource를 하나 더 추가로 입력해준다.
class ViewController: UIViewController,UIPickerViewDataSource {
그렇게 되면 이 클래스는 UIPickerViewDataSource 프로토콜을 따르게 되어, 아래에 그냥 component/row를 전달하는 메서드를 작성해주고 변수를 지운다.
그리고 picker.dataSource = self로 해주면 자기 자신이 전달을 해주게 되는 것.
class ViewController: UIViewController,UIPickerViewDataSource {

    @IBOutlet weak var picker: UIPickerView!

    override func viewDidLoad() {
        super.viewDidLoad()
        picker.dataSource = self


    }

    func numberOfComponents(in pickerView: UIPickerView) -> Int {
        1
    }

    func pickerView(_ pickerView: UIPickerView, numberOfRowsInComponent component: Int) -> Int {
        4
    }
}
그다음, 이제 row 내의 컨텐츠(그림, 텍스트 등)를 변경하는 방법은 델리게이트가 될것이다.
동일하게 클래스의 타입에 UIPickerViewDelegate를 추가로 입력해준다. (이때의 경우, Optional 메서드들을 가지고 있는 프로토콜이기 때문에 에러가 나지 않는다.)
titleForRow 가 파라미터로 포함된 메서드를 통해 row 내부에 들어갈 text를 입력하고, picker.delegate = self 로 Delegate를 위임해주어야 화면에 나타난다.
class ViewController: UIViewController,UIPickerViewDataSource, UIPickerViewDelegate {

    @IBOutlet weak var pickerLabel: UILabel!
    @IBOutlet weak var picker: UIPickerView!

    override func viewDidLoad() {
        super.viewDidLoad()
        picker.dataSource = self
        picker.delegate = self
    }

    func pickerView(_ pickerView: UIPickerView, titleForRow row: Int, forComponent component: Int) -> String? {


        return "컴포넌트 \(component), 로우 \(row)"
    }

    func numberOfComponents(in pickerView: UIPickerView) -> Int {
        2 // = return 2
    }

    func pickerView(_ pickerView: UIPickerView, numberOfRowsInComponent component: Int) -> Int {
        // 4 rows for component 0, 6 rows for component 1
        component == 0 ? 4 : 6

    }
PickerView에서, component 0는 이름, component 1은 사진이 나오도록 하는 법?
이미지는 viewForRow, 텍스트는 titleForRow 파라미터를 받는 메서드를 구현하면 됨.
func pickerView(_ pickerView: UIPickerView, viewForRow row: Int, forComponent component: Int, reusing view: UIView?) -> UIView {
        let imageView = UIImageView()

        if component == 0 {
            imageView.image = UIImage(named: btsImage[row])
            imageView.contentMode = .scaleAspectFit
        } else {
            imageView.image = UIImage(systemName: SFSymbolsImage[row])
            imageView.contentMode = .scaleAspectFit

        }
        return imageView
    }
PickerView에서 버튼 클릭 시 특정 row(5)로 가기
// pickerView.selectedRow(inComponent: 0)
// pickerView.selectRow(5, inComponent: 0, animated: true)
@IBAction func actRoll(_ sender: Any) {
picker.selectRow(5, inComponent: 0, animated: true)
}
'앱 개발 > iOS' 카테고리의 다른 글
| TableViewCell 재사용 (dequeueReusableCell) (0) | 2024.09.02 |
|---|---|
| UITableView의Delegate Pattern (0) | 2024.09.02 |
| UIImageView 실습: Index 활용법, 버튼 이미지 삽입, Refactor, (0) | 2024.08.30 |
| 뷰컨트롤러 클래스 연결 방법 (iOS Storyboard) (0) | 2024.08.30 |
| UI 컴포넌트 실습 (UISegmentedControl, UITextField, UISlider, UISwitch, UIStepper) (0) | 2024.08.29 |


