
나의 발자취
UITableView의Delegate Pattern 본문
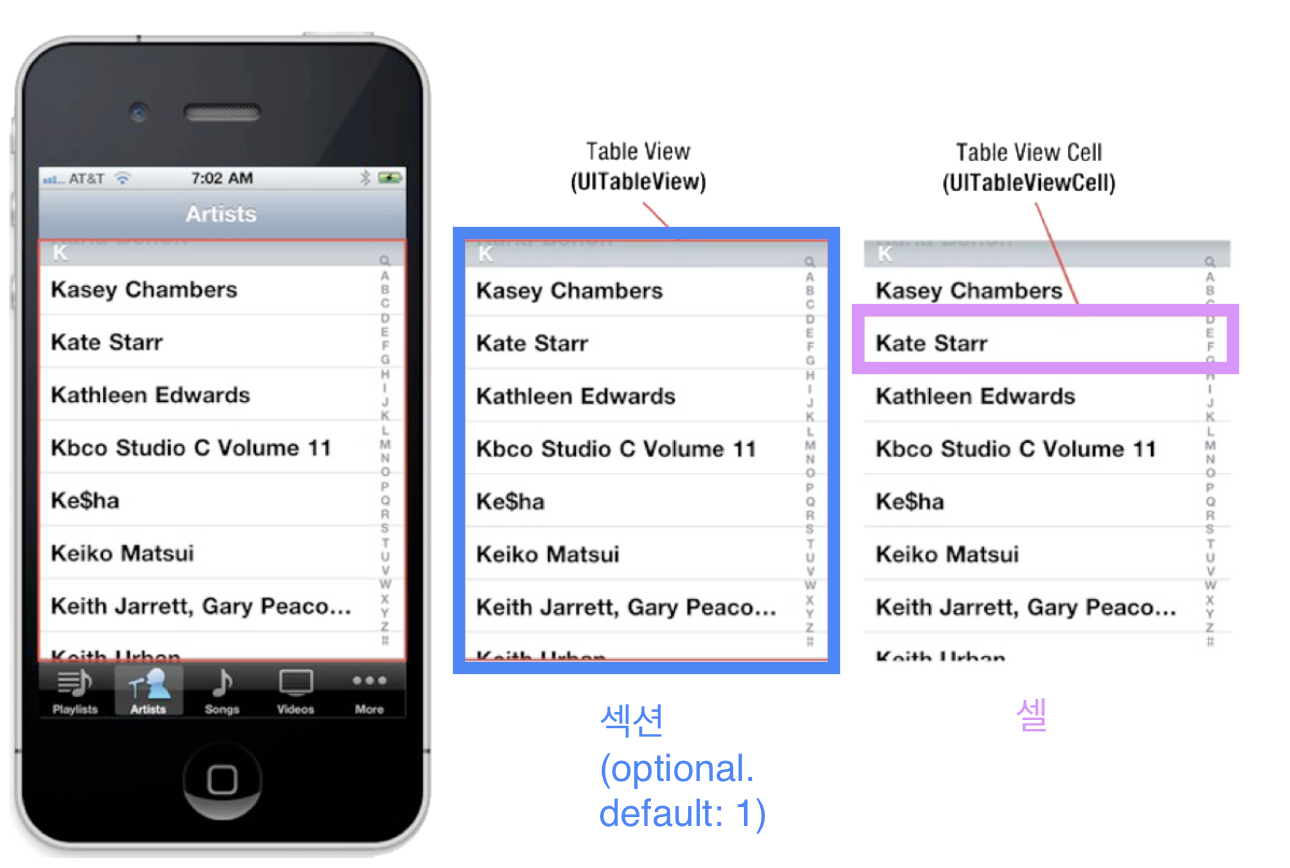
IndexPath
public protocol UITableViewDelegate : NSObjectProtocol, UIScrollViewDelegate {
@available(iOS 2.0, *)
optional public func tableView(_ tableView: UITableView, willDisplay cell: UITableViewCell, forRowAt indexPath: IndexPath)
IndexPath로 section, row, item을 받는다.
- IndexPath.section
- IndexPath.row
- IndexPath.item
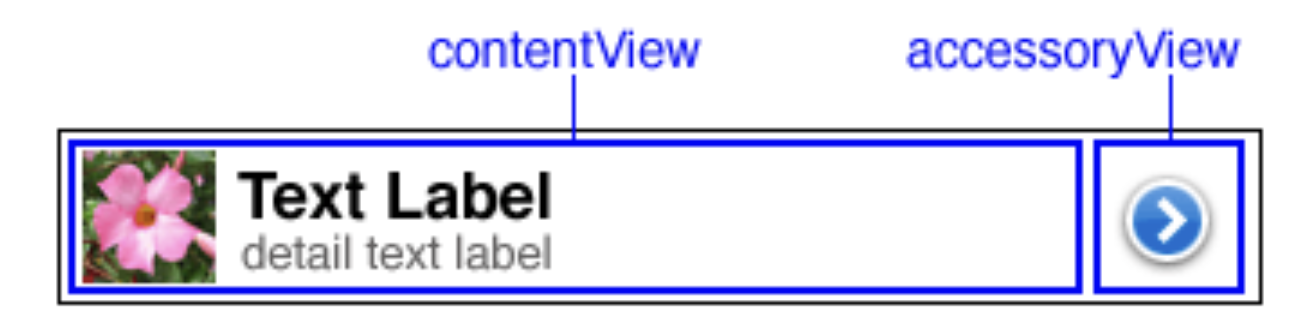
UITableViewCell
Cell 안에 ContentView가 있고, ContentView 안에 세 개의 UIView(1 UIImage, 2 UILabel)이 있다.
셀 안에 요소들을 구성하는 절차는
1. 클래스 참조변수(일반적으로 cell을 사용)을 선언해서 UITableViewCell() 인스턴스로 만든다.
let cell = UITableViewCell()
2. 구조체 생성(content)을 해서 cell 기본값 설정 후, 각 구조체별 구성을 정의해줌
var content = cell.defaultContentConfiguration()
content.text = "\(indexPath.section)번째 섹션, \(indexPath.row)번째 로우"
content.secondaryText = "\(bts[indexPath.row]), \(indexPath.row+1)번째 멤버"
content.image = UIImage(named: btsImage[indexPath.row])
content.imageProperties.maximumSize.height = 100
3. 이와 같이 설정한 content를 cell의 content config 설정값으로 넣어준다.
cell.contentConfiguration = content
import UIKit

class ViewController: UIViewController, UITableViewDataSource{


    @IBOutlet weak var tableView: UITableView!

    override func viewDidLoad() {
        super.viewDidLoad()
        tableView.dataSource = self
//        tableView.delegate = self

    }
    func tableView(_ tableView: UITableView, numberOfRowsInSection section: Int) -> Int {
        10
    }

    // By Default
//    func numberOfSections(in tableView: UITableView) -> Int {
//        1
//    }

    func tableView(_ tableView: UITableView, cellForRowAt indexPath: IndexPath) -> UITableViewCell {
        // 1. 클래스 참조변수 cell 생성
        let cell = UITableViewCell()
        // 2. 구조체 content 생성: set default content config
        var content = cell.defaultContentConfiguration()
        content.text = "\(indexPath.section)번째 섹션, \(indexPath.row)번째 로우"
        content.secondaryText = "secondary text"
        content.image = UIImage(systemName: "heart.fill")

        // 3. put cell into content config
        cell.contentConfiguration = content

        return cell

    }

}
실습

이미지 Asset 넣기

import UIKit

class ViewController: UIViewController, UITableViewDataSource{

    let btsImage = ["bts1", "bts2", "bts3", "bts4","bts5","bts6",
                    "bts7"]
    let bts = ["RM","진","슈가","제이홉","지민","뷔","정국"]

    @IBOutlet weak var tableView: UITableView!

    override func viewDidLoad() {
        super.viewDidLoad()
        tableView.dataSource = self
//        tableView.delegate = self

    }
    func tableView(_ tableView: UITableView, numberOfRowsInSection section: Int) -> Int {
        btsImage.count
    }

    // By Default
    /*
    func numberOfSections(in tableView: UITableView) -> Int {
        1
    }
     */

    func tableView(_ tableView: UITableView, cellForRowAt indexPath: IndexPath) -> UITableViewCell {
        // 1. 클래스 참조변수 cell 생성
        let cell = UITableViewCell()
        // 2. 구조체 content 생성: set default content config
        var config = cell.defaultContentConfiguration()
        config.text = "\(bts[indexPath.row])"
        config.secondaryText = "\(indexPath.row+1)번째 멤버"
        config.secondaryTextProperties.color = UIColor.red
        config.textProperties.font = UIFont.systemFont(ofSize: 20, weight: .bold)
        config.textProperties.color = .blue
        config.image = UIImage(named: btsImage[indexPath.row])
        config.imageProperties.maximumSize.height = 100
        // 3. put content config into cell
        cell.contentConfiguration = config

        return cell

    }

}
contentView의 이미지 요소의 크기를 조절하는 방법은
content.imageProperties.maximumSize.height = 100
이런식으로 설정을 해준다.
'앱 개발 > iOS' 카테고리의 다른 글
| iOS WebKit: Web <> App 통신하기 (4) | 2024.09.05 |
|---|---|
| TableViewCell 재사용 (dequeueReusableCell) (0) | 2024.09.02 |
| Protocol, Delegate Pattern in UIPickerView (0) | 2024.09.02 |
| UIImageView 실습: Index 활용법, 버튼 이미지 삽입, Refactor, (0) | 2024.08.30 |
| 뷰컨트롤러 클래스 연결 방법 (iOS Storyboard) (0) | 2024.08.30 |


