
나의 발자취
[UIKit] Notification 기능 구현하기 본문
이번에는 UIKit을 이용해서 Noti를 만들어볼것이다.
AppDelegate는 app lifecycle 전체를 관리하는 파일이다.
AppDelegate.swift
알람의 경우에는 이 AppDelegate 파일에서 만들게 된다.
didFinishLaunchngWithOptions 안에 구현을 해준다.

UNUserNotificationCenter.current().delegate = self
UN=UserNotification의 줄임말이다.
UNUserNotificationCenter.current().delegate = self
let option = UNAuthorizationOptions(arrayLiteral: [.alert, .badge, .sound])
arrayLiteral 안의 요소들은 아래 Notification 설정에서 토글 버튼에 있다. 요즘은 .badge를 안하는 추세라 .badge를 제외하고 하기로 했다.


에러가 뜨는데, 정상이다.

UN기능을 쓰려면 AppDelegate가 그에 맞는 프로토콜(UNUserNotificationCenterDelegate)을 따라야한다. 클릭하게 되면 아래와 같이 수정이 된다.

ViewController.swift
UserNotification은 iOS에서 알림을 처리하는 강력한 시스템으로, 앱이 사용자에게 알림을 보낼 수 있게 해줍니다. 알림은 UNNotificationRequest 객체를 통해 요청되고, 이 객체는 Content(알림의 내용), Trigger(알림을 보낼 조건), 그리고 Request(알림 요청)에 대한 세 가지 주요 구성 요소로 구성됩니다
Notification은 구성이 content와 trigger, request로 되어있다.
- content: 알림에 보여줄 내용을 의미한다.
- trigger: 어떤 상황일 때 보여줄 것인가? 이다. Time interval, Calendar, Location 이렇게 세 가지 종류가 있다.
- request: dkffla dycjd
trigger에 해당하는 버튼을 세개 만들고 연결을 해준다.

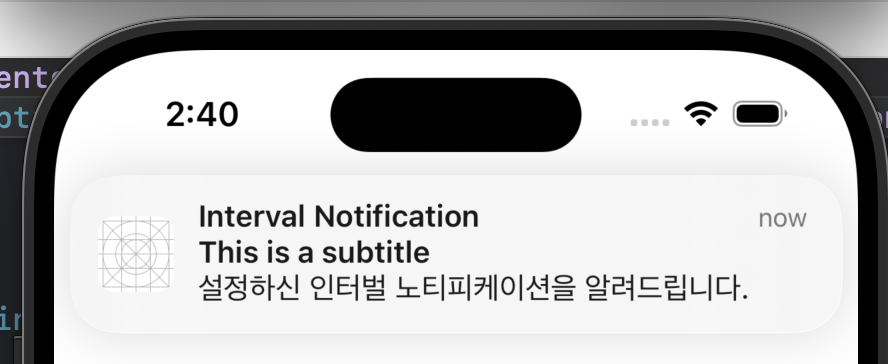
1. Time Interval Notification
그리고 위에서 말한 대로, 메서드 안에 순서대로 만들어준다.
- content
let content = UNMutableNotificationContent()
content.title = "Interval Notification"
content.subtitle = "This is a subtitle"
content.body = "설정하신 인터벌 노티피케이션을 알려드립니다."
- trigger
let trigger = UNTimeIntervalNotificationTrigger(timeInterval: 2, repeats: false)
- request
let request = UNNotificationRequest(identifier: UUID().uuidString, content: content, trigger: trigger)
마지막으로 이 request를 UNUserNotificationCenter에다가 전달해준다.
UNUserNotificationCenter.current().add(request) {
            (error) in
            if let error {
                print("알림설정에 실패했습니다.")
            }
            print("알림설정에 성공했습니다.")
        }
userInfo를 같이 보내려면 정보도 집어넣어준다. (기본적으로 딕셔너리 구조로 되어있다.)
    @IBAction func actInterval(_ sender: Any) {
        let content = UNMutableNotificationContent()
        content.title = "Interval Notification"
        content.subtitle = "This is a subtitle"
        content.body = "설정하신 인터벌 노티피케이션을 알려드립니다."
        content.userInfo = ["name": "정년이"]

        let trigger = UNTimeIntervalNotificationTrigger(timeInterval: 2, repeats: false)

        let request = UNNotificationRequest(identifier: UUID().uuidString, content: content, trigger: trigger)

        UNUserNotificationCenter.current().add(request) {
            (error) in
            if let error {
                print("알림설정에 실패했습니다.")
            }
            print("알림설정에 성공했습니다.")
        }
    }
appDelegate.js
class ApDelegate안에 func userNotificationCenter 함수를 실어준다. 이 함수의 willPresent는 앱이 실행될때만 알람을 보여준다.
    func userNotificationCenter(_ center: UNUserNotificationCenter, willPresent notification: UNNotification, withCompletionHandler completionHandler: @escaping (UNNotificationPresentationOptions) -> Void) {
        completionHandler([.banner, .sound])
    }
만약 아까 넣은 userInfo를 가지고 오고 싶다면, 아래와 같이 가져올 수 있다.
 func userNotificationCenter(_ center: UNUserNotificationCenter, willPresent notification: UNNotification, withCompletionHandler completionHandler: @escaping (UNNotificationPresentationOptions) -> Void) {
        let info = notification.request.content.userInfo
        print(info["name"])
        completionHandler([.banner, .sound])
시뮬레이터 확인
console log에는 내가 집어넣은 User info의 name valuer값이 담겨있다.

2. Calendar Interval Notification
DateComponents() 인스턴스 객체를 쓸것이다.
DateComponents()를 이용하면 특정 시간에 알람을 보낼 수 있다.


ViewController.swift
        let content = UNMutableNotificationContent()
        content.title = "Calendar Notification"
        content.subtitle = "This is a subtitle"
        content.body = "설정하신 캘린더 노티피케이션을 알려드립니다."
        content.userInfo = ["name": "정년이"]

        UNUserNotificationCenter.current().removeAllDeliveredNotifications()


        var dateComponents = DateComponents()

        dateComponents.hour = 14
        dateComponents.minute = 56

        let trigger = UNCalendarNotificationTrigger(dateMatching: dateComponents, repeats: true)
        let request = UNNotificationRequest(identifier: UUID().uuidString, content: content, trigger: trigger)

        UNUserNotificationCenter.current().add(request)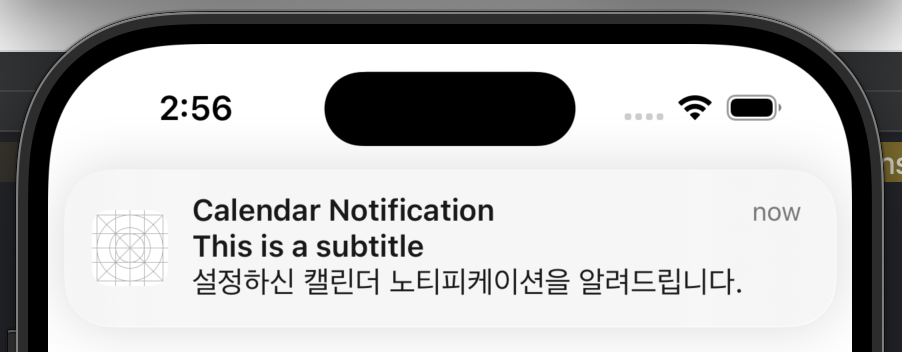
코드에 설정된대로 오후 2시 46분에 알람이 오는걸 볼 수 있다.
알람 삭제
UNUserNotificationCenter.current().removeAllDeliveredNotifications()
- 앱이 시작될 때: 앱이 시작될 때 이전에 표시된 알림을 모두 제거할 필요가 있을 때 사용한다. 예시: 앱을 처음 열 때 또는 새로 로그인할 때 이전에 표시된 알림들을 모두 제거하고 새로운 알림을 표시
- 사용자가 특정 작업을 완료한 후: 사용자가 특정 작업(예: 알림을 통해 할 일을 마친 후)을 완료한 후 해당 작업에 대한 알림을 제거하려할 때 사용한다. 예시: 사용자가 알림을 클릭하고 작업을 완료했을 때 해당 알림을 지우고 싶을 때.
- 알림을 다시 보내기 전에 기존 알림 제거: 새로운 알림을 보낼 때, 이전 알림이 화면에 남아 있지 않도록 삭제하고 새로운 알림을 보내는 경우에도 사용된다.
3. Location Notification
마지막으로 위치 기반 알람은, CoreLocation 라이브러리가 필요하다.
ViewController.swift
        let content = UNMutableNotificationContent()
        content.title = "Location Notification"
        content.subtitle = "This is a subtitle"
        content.body = "설정하신 위치 기반 노티피케이션을 알려드립니다."
        content.userInfo = ["name": "정년이"]

        let center = CLLocationCoordinate2D(latitude: 37, longitude: -122)
        let region = CLCircularRegion(center: center, radius: 1000, identifier: "iOS study")

        region.notifyOnEntry = true
        region.notifyOnExit = true

        let trigger = UNLocationNotificationTrigger(region: region, repeats: true)
        let request = UNNotificationRequest(identifier: UUID().uuidString, content: content, trigger: trigger)

        UNUserNotificationCenter.current().add(request)
알람 유저 액션
마지막으로, 사용자가 알람을 클릭하는 액션을 수행해서 뭘 해야할 때는 아래 메서드를 쓴다.
userNotificationCenter(_:didReceive:withCompletionHandler:) 메서드는 사용자가 알림을 클릭하거나 알림에 대한 특정 액션을 수행했을 때 호출된다. 이 메서드는 푸시 알림이나 로컬 알림을 받은 후, 사용자가 알림을 처리하려고 할 때 앱 내에서 수행해야 할 작업을 정의하는 데 사용된다.
언제 사용되는가?
이 메서드는 앱이 백그라운드나 포그라운드에서 알림에 반응할 때 호출된다. 일반적으로 다음과 같은 상황에서 호출된다.
- 사용자가 알림을 클릭했을 때:
- 로컬 알림이나 푸시 알림에서 사용자가 알림을 탭하거나 클릭할 때 호출. 이 메서드 내에서 알림에 대한 추가 작업(예: 해당 화면으로 이동, 데이터 처리 등)을 할 수 있다.
- 알림 액션을 수행했을 때:
- 알림에 버튼과 같은 액션이 포함되어 있을 때, 사용자가 그 액션을 선택하면 이 메서드가 호출된다. 예를 들어, 알림에서 "확인" 버튼을 눌렀을 때 특정 작업을 처리할 수 있다.
    // 뭘 해야할 때
    func userNotificationCenter(_ center: UNUserNotificationCenter, didReceive response: UNNotificationResponse, withCompletionHandler completionHandler: @escaping () -> Void) {
        let info = response.notification.request.content.userInfo
        print(info["name"] ?? "")
        completionHandler()

    }
'앱 개발 > iOS' 카테고리의 다른 글
| [UIKit] Remote Push Notification Alert 구현 (feat.APNs) (0) | 2024.11.22 |
|---|---|
| [SwiftUI] Notification 기능 구현하기 (2) | 2024.11.21 |
| 이어서 (0) | 2024.11.19 |
| [SwiftUI ver] 당근마켓 거래서비스 풀스택 구현하기 (Frontend) - 탭바 (0) | 2024.11.19 |
| [SwiftUI ver] 당근마켓 거래서비스 풀스택 구현하기 (Frontend) - 무한 스크롤 (0) | 2024.11.19 |


